BLACK HOLE SUNS - STAR NAVIGATION TOOL GUIDE
Background: This tool and procedure outlined below is a guide to the BHS Star Nav Tool that helps Travelers navigate the stars in No Man’s Sky. Currently, there are TWO methods that we have made available for long distance travel. One method uses “Custom Waypoints”, which is documented on our Travel Guide. This document reviews the second method, which provides angles that you can approximate using the 3D map featured on the Star Nav Tool.
Procedure:
The best way to warp vast distances in No Man’s Sky is to use our Distance and Route Calculator. All players, regardless of platform, can leverage the new Star Nav Tool to track your progress towards any target if necessary. The tool is designed to be fast, easy, and works great on mobile. Following is the procedure:
- Enter your current position (in Galactic Coordinate format). You get your current position by using a Signal Booster. As an example, after you open the Signal Booster, you will see the coordinates such as “ABCD:0428:0078:0D53:001B”. You don’t need the “ABCD” part ever. Your true position is 0428:0078:0D53:001B. Type your current coordinates into the “Start Coordinates” box. You don't need to include the colons (:), the tool will do that for you.
- Enter your desired position (in the same format). This could be a black hole that you need for your DARC route, or any location you need to warp to.
- Enter your ship's hyperjump capacity.
- The Star Nav Tool will report how far away you are from your objective, and the map will display the angle you need to take in relation to the Galaxy Center. The green dot is your current position, the red dot is your target destination, and the grey dot is the center of the galaxy.
- IMAGE 1 (below) is a sample of the display. It shows where you are, your destination, and guidelines connecting your position to the center, and your two points to each other.
- IMAGE 2 is the next step. On the map output, ROTATE the map until the GREEN starting point is directly in front of the Galaxy Center. This creates an angle of approach for your destination and shows where your target is in relation to the Galaxy Center.
- IMAGE 3 is the final step. ROTATE the map until you have a top-down view of the path. This shows the angle of approach to your target in relation to the Galaxy Center. In this example, the target is roughly at "11 oclock" in relation to the center. While you are in-game and have the Galactic Map open, estimate this angle using the Galaxy Center as your reference point, and start warping (it is assumed that you have a decent hyperdrive capacity; 2000 Light Years or better is great).
- From the Galactic Map, warp between 5-10 times (whatever your comfort level is), land on a nearby planet, get new coordinates for your current position (using a Signal Booster), and plug that new position into the Nav. Adjust your angle of approach on the Galactic Map accordingly as you make progress. As you can already guess, as you make progress, the angle to the center will change, and the closer you get, the more you will need to check your position. Where applicable, players can still take advantage of the guidelines that point to a Custom Waypoint on the Galactic Map as they close in on a target.
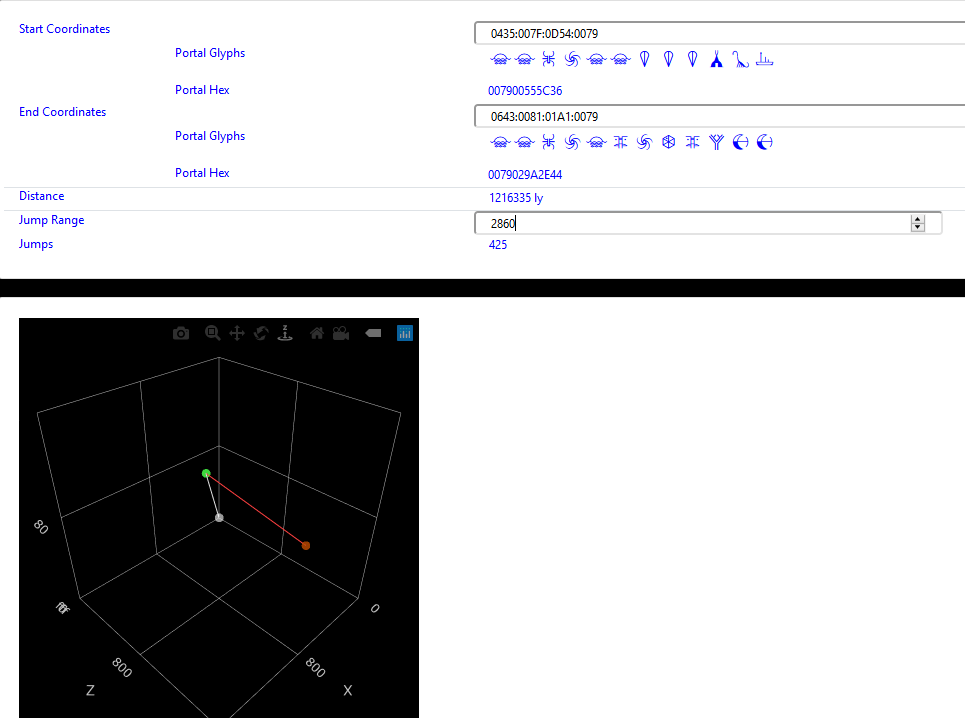
IMAGE 1 - STAR NAV OUTPUT
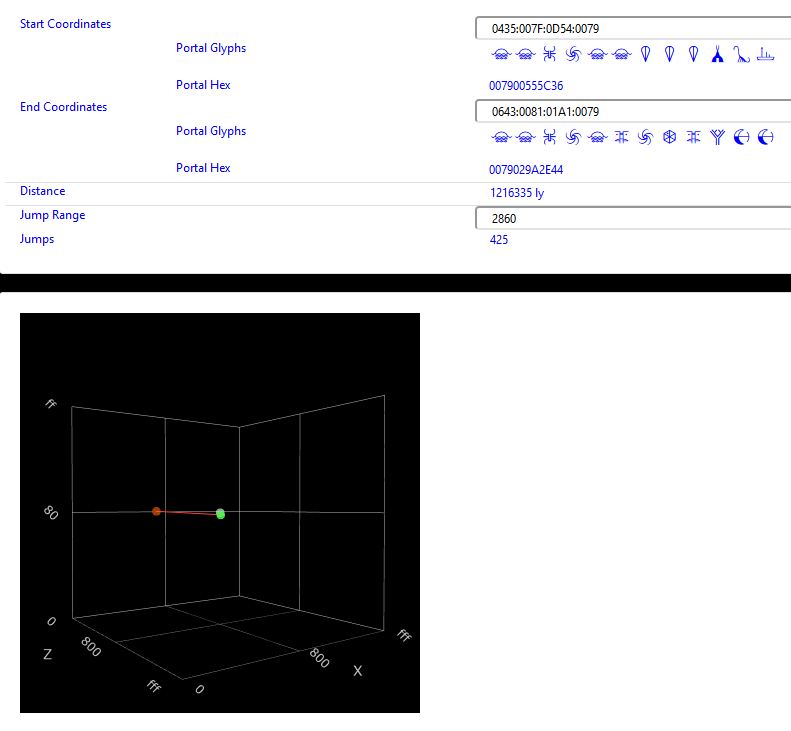
IMAGE 2 - ROTATE the map until the GREEN starting point is directly in front of the Galaxy Center
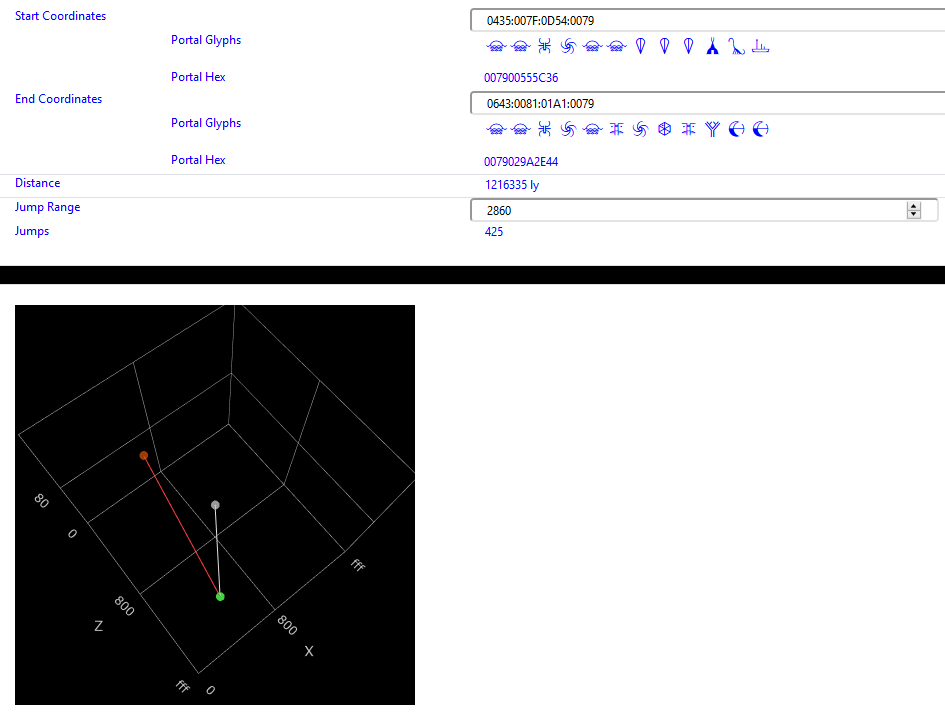
IMAGE 3 - ROTATE the map until you have a top-down view of the path
XBox, PC, and PS4 players can definitely leverage this tool and procedure if you would like to use an alternative to the "Custom Waypoint" method that is documented in our Travel Guide.
Questions? Feel free to post them in our sub-reddit or over on our Discord Server. Thanks!
Other Links: